Yikes, more character encoding problems! I am trying to format some demo data in a spread sheet for a visualization I am using. I often use the technique of saving an “excel” type document as CSV and then using python to convert the CSV to a JSON file to read in the browser. (Clearly this is a non optimal tool chain, but I usually don’t have the .xlsx file changing and so just run through it once).
Today, however, I attempted to read a JSON object from a cell and ran into interesting trouble. I needed to capture annotations to the data at specific data points, for example at t = 5.2 sec, “car jumped off the ramp”. In the LibreOffice file I have entered something of this format in a cell:
{ “5.2” : ”Car jumped off the ramp!” , ”10.6” : ”Crossed the finish line” }
This looks like valid JSON to me and if I type something similar a JSON evaluator will confirm for me it is valid JSON:
{
   "5.2":"Car jumped off the ramp!",
   "10.6":"Crossed the finish line"
}
However, when parsing this in javascript using JSON.parse() (required because the python csv.DictReader followed by json.dumps() only creates one level deep of a json structure, so these complex cell contents are stored in a string), I got the following message:
Uncaught SyntaxError: Unexpected token “
Humm… does this font reveal to you the possible problem? Looks like a weird quote character and the JSON spec is pretty clear, a plain old double quote is needed.
The file is saved as UTF-8 and printed to the terminal (verified the terminal encoding is also UTF-8 using “echo $LANG”) my quotes now print as “\xe2\x80\x9c” for the first one and “\xe2\x80\x9d” for the subsequent ones, which correspond to the Unicode code points “\u201C” and “\u201D”, also know as “Left Double Quotation Mark” and “Right Double Quotation Mark”.
I was also able to confirm this by pasting the error message quote character into this online hex converter.
Turns out when editing the cell contents in LibreOffice (to adjust the format to something that *should* be valid JSON) my quotes were being auto corrected. You can disable this “feature” from the menu “Tools >> AutoCorrect Options…” by disabling the Double quotes Replace in the lower right of the dialog as shown below. 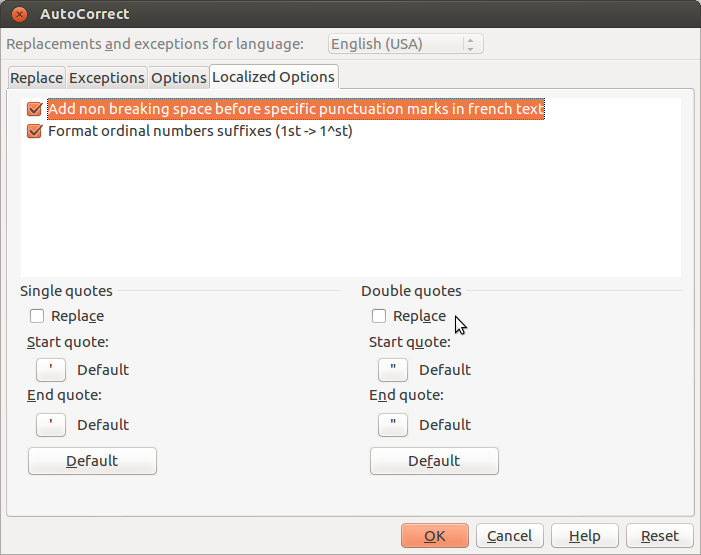
In case your source file wasn’t under your control, the following python can be used to replace a unicode character:
# replace Left Double Quote with "
fixedStr = brokenStr.decode('utf-8').replace(u"\u201c', "\"").encode('utf-8');
It also turns out that if you edit your cell contents in a different editor (like emacs) and then paste it in, the auto correction is not applied, which can make debugging a bit more confusing!
Lastly, I found the Unicode confusables site interesting, there are 15 confusable quote characters. So many!
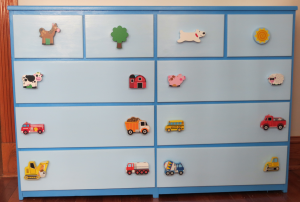
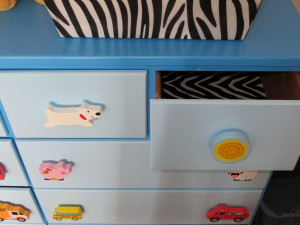
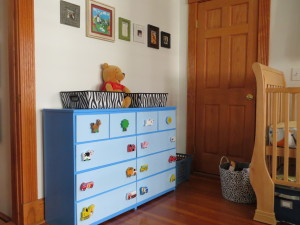 I refinished a dresser for my newest addition and it has received some compliments. The knobs are genius and as far as I know my own “invention”. The process is pretty simple, but it took me a while to get the parts together (namely finding mini wooden dowels to space the puzzle pieces off from the dresser), so I will share my process. Disclaimer: I make no claims as to the child safety of this design, it just seems good enough for me personally (so far!).
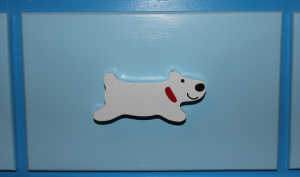 I refinished a dresser in blues for my nursery, but was struggling to find adequately cute hardware. Etsy had lots of hand painted knobs, but the artist in me thought, “I can do that myself…” This thought was tempered by my concern about a new baby eventually trying to eat the knobs and how to finish them appropriately. Then I noticed a used Melissa and Doug Chunky Puzzle that a friend had given us… How cute would these puzzle pieces be as knobs? And how simple as they are already finished and kid safe. Here is a picture of my first prototype knob, which I LOVED! To complete the project now I just needed a safe (enough for me at least) and easy way to turn the puzzle pieces into knobs. This meant something to space them out from the face of the dresser enough to easily grab from behind. The pieces are big enough that you might not really need to get your fingers behind, but it seemed nicer to me than just mounting them flat. So began a search for mini wooden dowels, which was actually the hardest part of this project. Turns out you can buy unfinished wooden toy wheels for crafting! (Although only one of my local Michaels carries them, so it took a while to find).
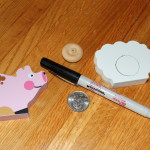
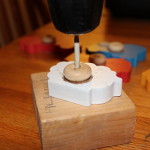
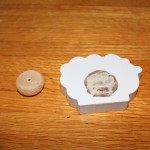
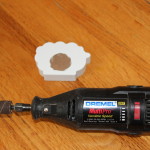 I then used a sanding bit on a Dremel tool to gently remove the paint from the wheel contact area. Of course you could use sand paper, but I found it difficult not to scuff the edges of the puzzle piece and I wanted to keep the painted sides looking good. Be gentle with the Dremel though because side loading it can damage the bearings.
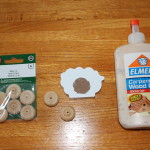

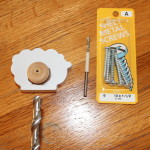 After the glue is cured, it is time to pre-drill pilot holes for your mounting screws. The holes in my dresser fit a #10 screw. The length of screw will vary based on the thickness of your drawer fronts, the wheel width and the thickness of the puzzle piece. I wanted to get as much thread engagement with the puzzle piece as I could (to rely on the glue less to keep things in place), so I spent some time at the hardware store trying to find just the right length for my dresser, in the end it was a 1.5″ sheet metal screw that did the trick.
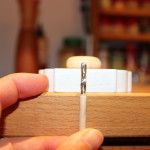 Next pick a drill bit for the pilot hole. If you’re not familiar with this process you can